
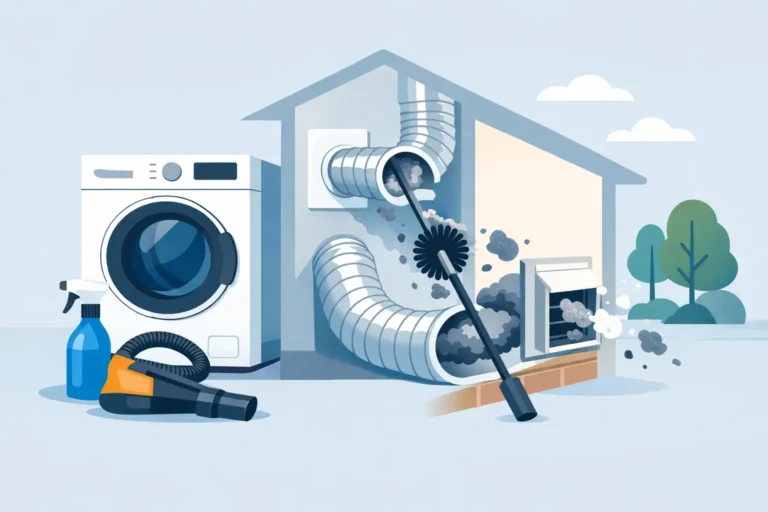
A dryer that suddenly takes two or three cycles to dry a load is not just frustrating when laundry is piling up. It can be a sign that lint is restricting airflow where you cannot see it. Knowing how to clean dryer vent ducting safely can improve drying performance, reduce wear on the appliance, and help protect your home.
A little lint in the filter after every load is normal. Lint collecting in the hose behind the dryer or in the duct that runs through the wall is different. That buildup traps heat and makes the dryer work harder. For most households, cleaning the full vent path once a year is a practical starting point. Homes with large families, pets, frequent laundry, or long vent runs may need attention more often.
Start by Recognizing a Dryer Vent Problem
Poor airflow does not always mean the dryer itself has failed. Before assuming you need a new heating element or a new machine, look for signs the vent may be clogged. Clothes may feel hot but remain damp after a normal cycle. The dryer cabinet or laundry room may feel unusually warm, and you may notice a musty or burning-lint smell.
Outside, the vent hood may barely open while the dryer is running. That is a strong clue that air is not moving properly. Lint around the outdoor hood is also common, although a hood that is completely covered with lint can point to a deeper blockage.
A new dryer can still have this problem if it is connected to an older, restricted duct. The same is true in rentals and multi-unit properties, where a hidden vent route can be longer or more complicated than expected.
What You Need to Clean a Dryer Vent
For a straightforward, accessible dryer vent, gather a vacuum with a hose attachment, a dryer-vent brush kit with flexible rods, a screwdriver or nut driver for the clamp, a flashlight, and a microfiber cloth. A cordless drill can turn some brush kits, but use a low speed and follow the kit instructions. Too much force can disconnect or damage a duct inside a wall.
Wear gloves and a dust mask if you are sensitive to dust. Lint gets everywhere, and old vent lines can release more debris than most people expect. Avoid using a leaf blower or high-pressure air as a shortcut. Those methods may push lint farther into the duct, force a joint apart, or leave a mess inside the wall.
How to Clean Dryer Vent Ducts Step by Step
1. Shut off power and, if applicable, gas
Unplug an electric dryer before moving it. If you have a gas dryer, unplug it and turn off the gas supply valve before working behind the appliance. Do not pull on the gas connector or try to disconnect it unless you are trained to do so.
Move the dryer forward carefully. If it sits on a pedestal, is in a tight closet, or has a short gas line, it may be safer to stop and schedule service rather than forcing the appliance out.
2. Remove and clean the lint screen
Pull out the lint screen and remove the visible lint. Then use a vacuum crevice tool to clean the screen housing. This is one of the most overlooked areas because lint can build up below the screen even when it is cleaned after every load.
If you use dryer sheets, wash the screen occasionally with warm water and a small amount of dish soap. Dryer-sheet residue can coat the mesh and reduce airflow. Let the screen dry completely before putting it back.
3. Disconnect the vent behind the dryer
Locate the vent connection at the back of the dryer. Loosen the clamp and gently remove the duct. Use a flashlight to check the dryer outlet and the first section of duct for lint, crushed areas, loose connections, or moisture.
Vacuum loose lint from the dryer outlet and the disconnected duct. Do not reach deep into the dryer cabinet with metal tools. Internal parts can be damaged, and some areas are better cleaned by a technician.
4. Brush the duct toward the exterior
Feed the vent brush into the duct slowly, adding flexible rods as needed. Rotate the brush gently and pull it back out periodically to remove lint from the brush. Work in short sections rather than pushing the whole length at once.
If the brush stops abruptly, do not force it. It may have reached a sharp elbow, a crushed section, a screen, or a disconnected joint. Forcing the rods can make a simple cleaning job into a repair.
For short, straight vents, you may be able to clean effectively from the dryer side. Longer routes, roof exits, and ducts with several turns often need to be cleaned from both ends. This is where professional equipment and experience make a real difference.
5. Clean the exterior vent hood
Go outside and find where the dryer exhaust exits the building. Remove lint from around the hood and make sure the flap can open and close freely. The flap should move with the airflow while the dryer runs, then close when it stops.
Do not install a fine mesh screen over a dryer vent. It may seem like a way to keep insects out, but it catches lint quickly and can create a blockage. A proper exterior hood with a functioning damper is the safer choice.
6. Reconnect, test, and check airflow
Reconnect the duct securely with the appropriate clamp. The connection should be snug without crushing the duct. Plug the dryer back in, turn the gas valve back on if applicable, and run the dryer on an air-only or low-heat setting for several minutes.
Check the outdoor hood. You should feel a steady stream of air and see the flap open. Back inside, listen for rattling and look behind the dryer to confirm the duct has not come loose. If airflow remains weak, stop using the dryer until the cause is found.
Check the Vent Material While You Are There
Not every dryer connection is equally safe. Flexible white vinyl or thin foil accordion-style ducts can sag, tear, and catch lint in their ridges. If your dryer is connected with one of these materials, replacing it with a properly sized metal transition duct is usually a worthwhile improvement.
The permanent duct inside the wall should also be metal, smooth where possible, and routed to the outdoors. A dryer should never vent into an attic, garage, crawlspace, or interior room. Venting indoors adds moisture and lint to the space and does not solve the airflow problem.
Keep the run as short and straight as the home allows. Every sharp turn slows airflow and gives lint another place to collect. In some homes, especially condos and older properties, the route cannot be changed easily. That does not mean the dryer cannot be used, but it does mean regular professional cleaning becomes more valuable.
When to Call for Dryer Vent Service
A DIY cleaning is reasonable when the dryer is easy to move, the vent is short, and you can confirm good airflow outside afterward. It is time to call a professional when the vent exits through the roof, the route is long or hidden, the dryer keeps overheating, or you cannot reach the blockage safely.
Call for help right away if you smell burning, see scorching near the vent connection, find water in the duct, or notice the dryer shutting off mid-cycle. These problems can involve more than lint. The appliance may have a failing part, a damaged duct, or an installation issue that needs hands-on diagnosis.
For landlords and property managers, vent maintenance is also a practical way to reduce repeat dryer complaints and protect tenant routines. Documenting cleanings and repairs can help identify units with unusually long runs or recurring airflow restrictions before they lead to a larger problem.
At Don’s Appliances, our technicians can assess both the dryer and the vent path, explain what is causing the slowdown, and give clear guidance on the most cost-conscious next step. Whether the issue is a simple lint restriction or a dryer that needs repair, the goal is the same: get laundry moving again without guesswork.
Make a habit of cleaning the lint screen after every load, keeping the area behind the dryer clear, and checking the exterior flap once in a while. If drying times start creeping up again, treat that early warning as a reason to act, not something to work around.
